

I'm a novice sewer with a lot of enthusiasm but not a lot of time. The easiest thing I have managed so far are cushions, much to my husbands dismay (it now takes him 2 minutes longer to get into bed as he has to remove all the cushions, oops!).
You don't need me to tell you cushions are an easy way to update and brighten any room, plus fun and easy to make.
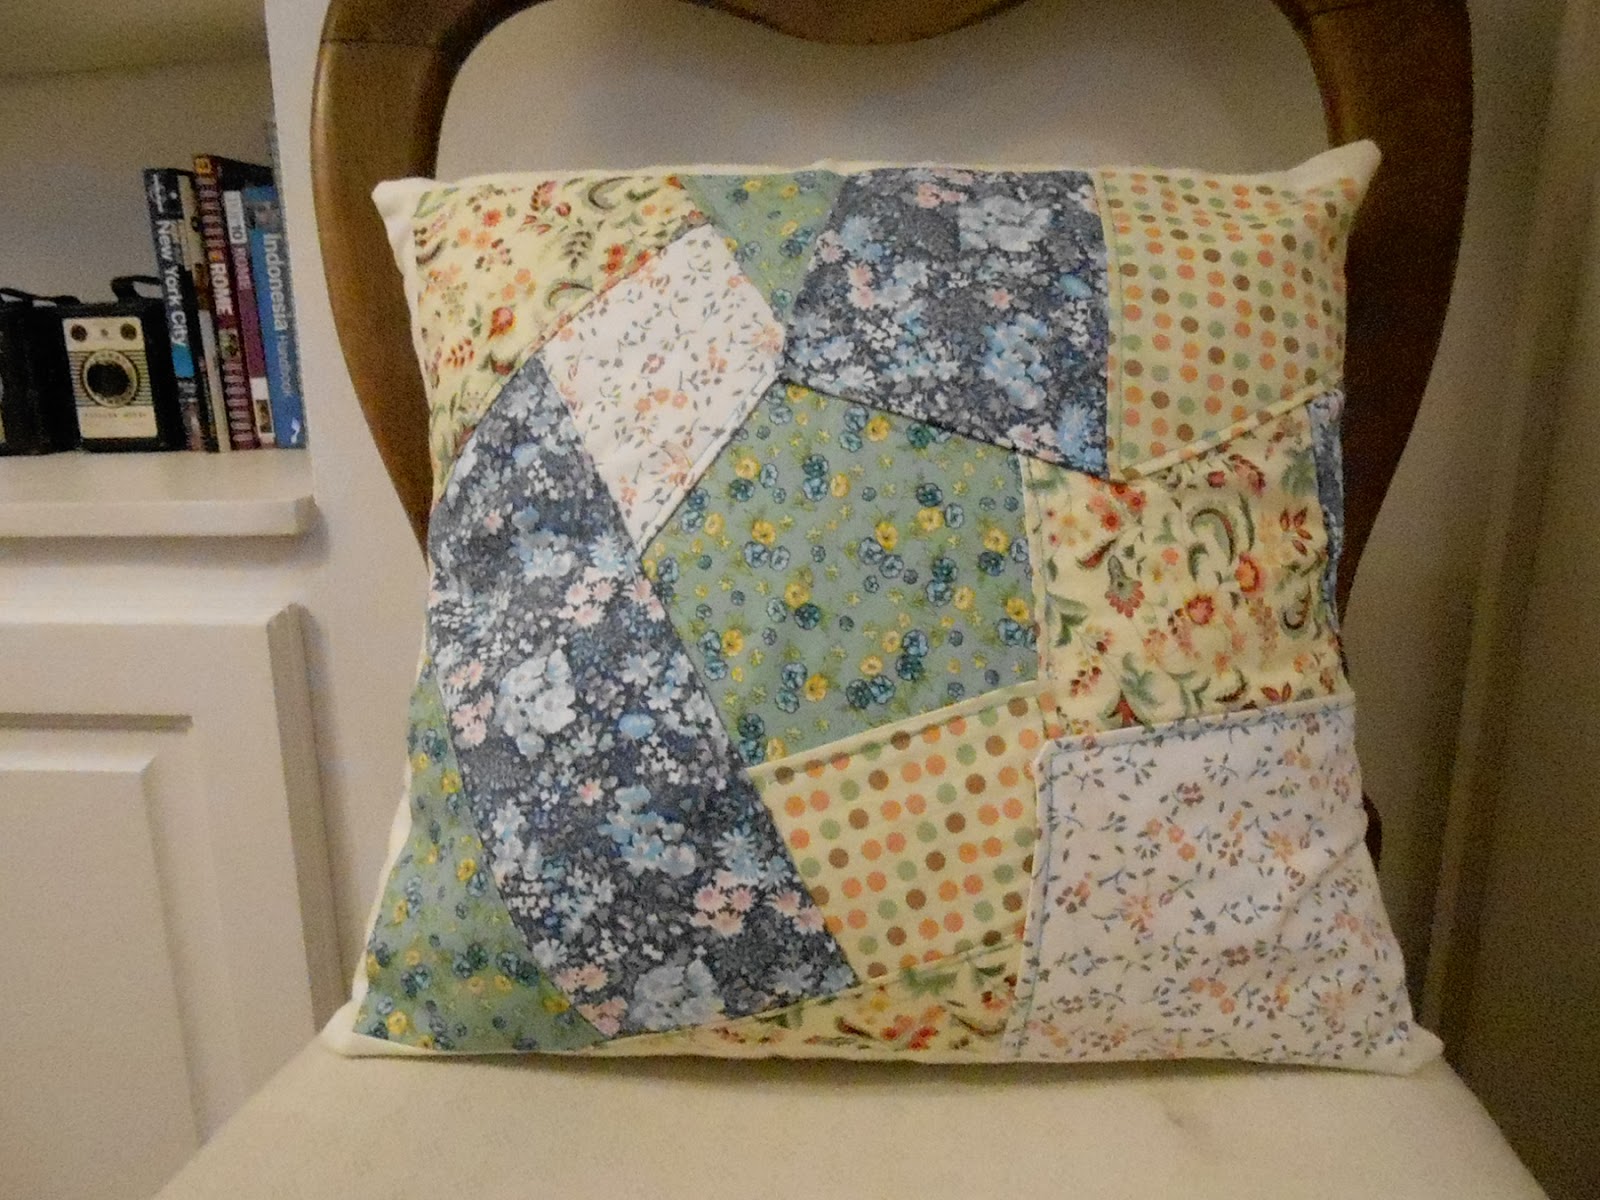
I was introduced to an exciting way of using up scrap bits of material called 'crazy patch'. Creating cushions this way means no cushion will ever be the same and because the bulk of the work is sewn by hand its a handy craft to do sat in front of the telly.
Here is my final cushion for the bed, I would love to add more but don't want to run the risk of getting divorced!

You will need;
1 x piece of calico cut to the size you desire for the cushion (can be ordered from Amazon or Ebay, or your local fabric store)
Scraps of material, enough to cover the size of your cushion
Needle
Thread
Sewing machine
Zip 30cm(optional)
Piece of material for back of cushion
Cushion pad (I used a duck down cushion pad from John Lewis)
Choose your fabrics, they don't have to perfectly match, in fact the more mismatched the better.
Step one
Cut the calico to the size of your cushion and add 1.5cm seam allowance all the way around. Here I am working on a 40cm x 40cm size cushion.
Step two
Take your first piece of fabric and position roughly in the centre of the cushion. With the piece of fabric wrong side up, sew down one side using a running stitch. Then flip over so the fabric is right side up.
Step three
Work out what size and colour fabric you wish to use next and where you want it positioned. It needs to overlap the first piece you have already sewn. Use the same method as before, sewing down one side with the fabric wrong side up, then flip over once sewn.
* Handy tip - try and use odd shapes rather than the obvious square/rectangular ones so your cushion looks less contrived.
* Handy tip - try and use odd shapes rather than the obvious square/rectangular ones so your cushion looks less contrived.
Step Four
Repeat this process using all different size pieces of fabric and in as many patterns/colours you like until you have covered the size of the calico. Once its finished it will look larger as the pieces of fabric will overlap.
Trim these overlapping fabrics so you are left with a neat square (or what ever size you are working to).
Some shapes will have a side which is not sewn down. The easiest and most effective way to approach this is to use a decorative top stitch. My sewing machine is quite old and dated so I have just used a normal straight stitch but by all means use which ever stitch you can.
Step Five
To complete the cushion you can either use a piece of material, pin with your crazy patch square, with right sides together and stitch 3 sides of the square. Turn inside out, insert the cushion and then blind stitch the final side.
Or if you would like to be able to wash your cushion, you can add a zip so it's easily removed.
Measure 2 pieces of fabric so they are exactly half the size of the cushion you are making, here my two back pieces measured 20cm then I added a 1.5cm seam allowance around each piece.
With right sides together, pin in place and sew approx 8cm in from each end.
Open and press the seam. Take your zip, I used a 30cm invisible zip, and pin underneath.
Using your zipper foot, sew down each side as close to the zipper teeth as possible.
Taking your crazy patch panel, place right sides together and stitch all the way around. Make sure the zip has been left slightly undone so you can open once sewn and turn inside out easily.
Insert cushion and away you go!


Here is a another cushion I did a few months back with a different backing technique.
No comments:
Post a Comment
Thanks for your messages.
I'll try to reply to as many of you as possible and will take a look at your lovely blogs too!
Quirky Pretty Thingz